1
Microsoft Word 2013: Create a Table of Contents Automatically
The easiest way to create a table of contents is to use the built-in heading styles. You can
create a table of contents that is based on the custom styles that you will add to your
document. For example you might only want a Heading 1 in your Table of Contents, or
both Heading 1 and Heading 2. This tutorial will explain how to Modify a Heading Style
then apply it to your document. Once that is completed then the Table of Contents can be
added and updated easily. Also included are details to remove a Table of Contents.
Mark Entries By Using Built-In Styles or Modify Styles
If your document is already created then select the words to which you want to apply a
heading style to, which when the Table of Contents is added will list as the first indent
or Heading 1 as shown below. If it is a brand new document you are building then each
time before you start typing choose Heading1 style for it to appear in your Table of
Contents.
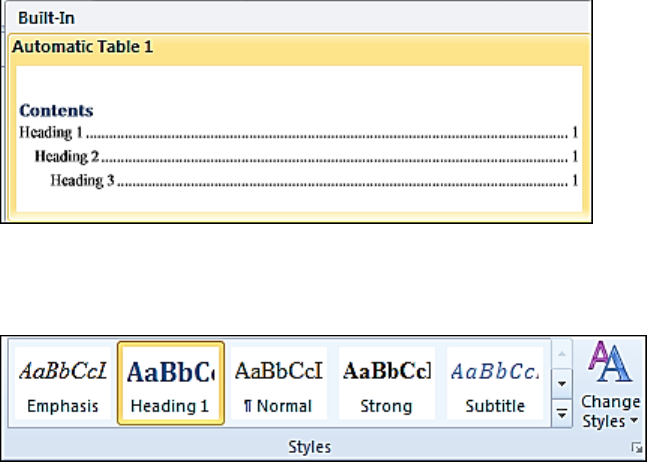
Select the text, then on the Home tab, in the Styles group, click the Heading 1 style. This
will change that text to be a style for the Table of Contents.
If the style for Heading 1 does not have the correct font, size and color you can change it
by right mouse clicking and choose Modify in the Styles gallery.
2
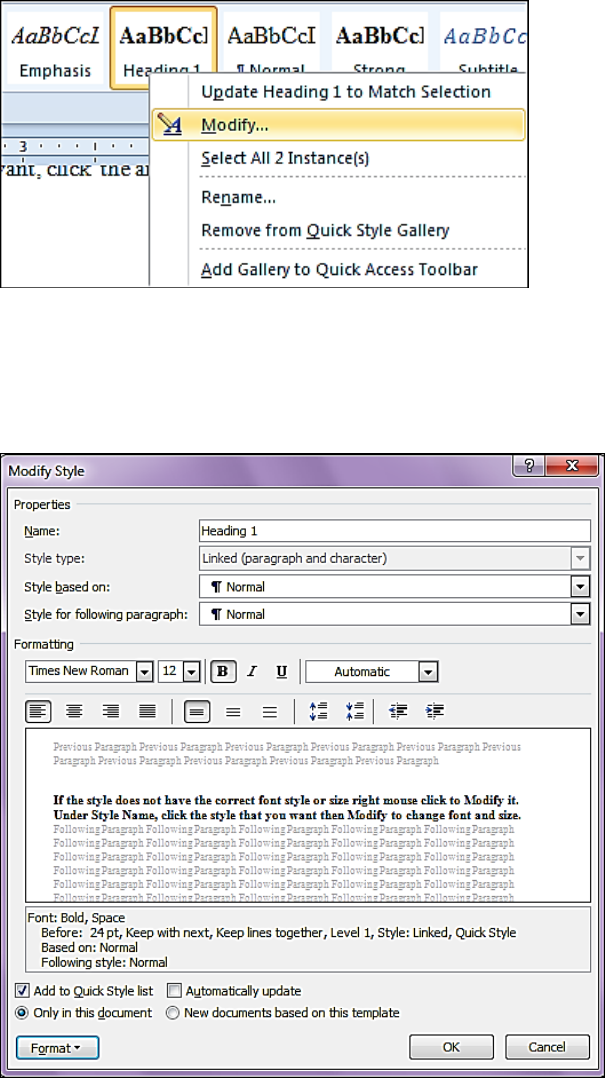
Under Name, you can change it or leave as Heading 1. The Formatting area is where
you will change the Font type, size and color. Notice at the very bottom you can choose
Only in this document or New documents based on this template. Click OK when
finished. Your Heading 1 style will now be changed on the Styles Gallery.
If you know you want to use Heading 2, then Modify that style to reflect the Formatting
you want. Click OK.

3
Now Create A Table Of Contents
Now that your document has styles added to specific entries for your table of contents
you are ready to add a Table of Contents.
Click where you want to insert the table of contents, at the beginning of a document. If
you need to add a blank page at the beginning, click on Insert tab, Blank Page. Have
your cursor sitting at the place you want to table to be.
On the References tab, in the Table of Contents group, click Table of Contents, and
then click on the table of Contents style that you want which will insert it.
A Table of Contents will now appear as shown below.
4
Update A Table Of Contents
If you already have a table of contents in your document, but now you have edited the
text by either adding or taking away text, which will make a change in your page
numbers in your Table of Content change, then you will need to update the table of
contents. Hold your mouse over the Table of Contents and it will appear blue as shown
below. Just click someone in that area to select the Table of Contents.
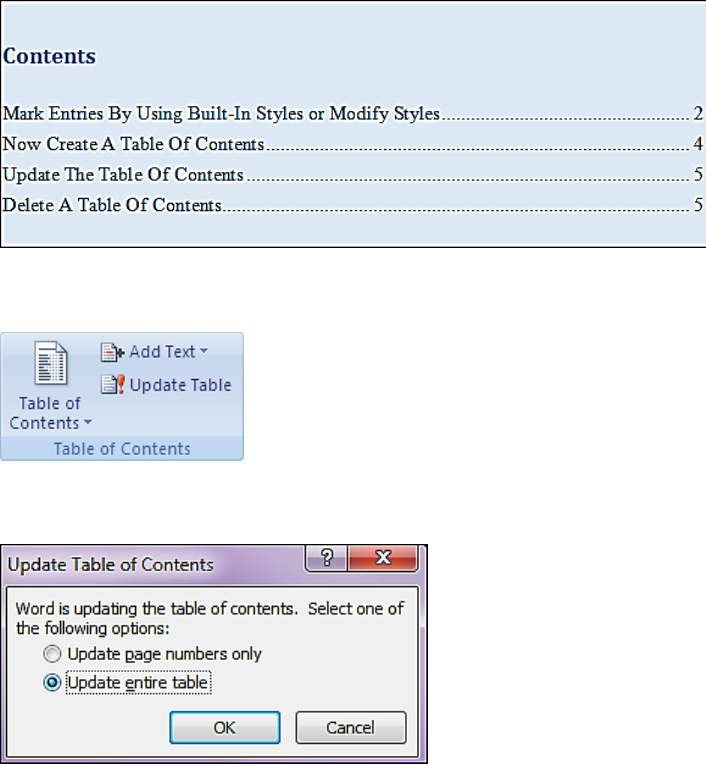
On the References tab, in the Table of Contents group, click Update Table.
Click Update page numbers only or Update entire table. Click OK.
You can also click on the Update from within the table on the document as shown below.
To the left of Update it a drop down arrow that allows you to change they type of Table
of Contents.

5
Delete A Table Of Contents
On the References tab, in the Table of Contents group, click Table of Contents.
Click Remove Table of Contents. You can also Remove Table of Contents on the
Update drop down as shown on screen shot above.
More Helpful Instructions on Table of Contents:
http://office.microsoft.com/en-us/word-help/introduction-to-tables-of-contents-tocs-
RZ103988290.aspx?CTT=1
